It’s easy to get lost in all of the options at your fingertips, and a few of the systems are a tad obtuse. This guide will take a look at crafting from the ground up.
How to Unlock Crafting
You unlock crafting after completing the First City destination, which is unlocked after finishing the main quest points in Rift Town. Here, you work with Doctor Abraham Zahedi, who ultimately provides his crafting services to you.
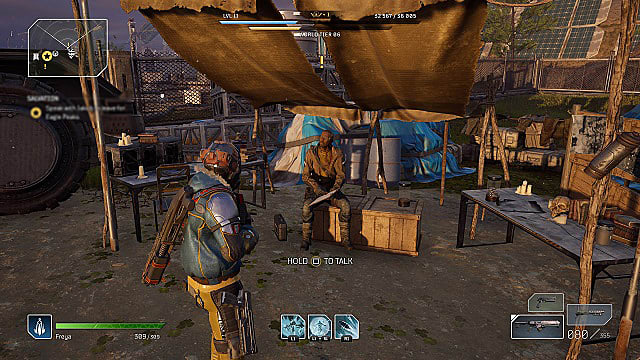
Zahedi is always in your camp after this. Typically, he’s to the left or right of Jakub, and he has a wrench and screwdriver icon over his head.
How to Craft Weapon and Armor Upgrades
Crafting in Outriders isn’t about creating items from scratch, as you would in something like Skyrim or No Man’s Sky. For the sake of this guide, we’ll call it crafting, but it’s more of an upgrade and modification system than anything else.
To initiate crafting, simply speak to Zahedi and choose the first option: “I need to upgrade my gear.” When the crafting menu appears, you’ll see items on the left, an empty box in the middle, and a greyed-out menu to the right.
The items on the left are all of the items you have equipped (top section) and in your inventory (everything else). Select an item you wish to improve, and it will move to the box in the center of the screen. You’ll then see options appear in the menu to the right.
For some items, all of the options are available. For others, only a few options are available.
Now, you’ll simply want to choose the improvement/upgrade option that you want.
Improve Rarity: Allows you to improve an item’s rarity (such as upgrading an uncommon [green] rarity shotgun to an epic [purple] rarity shotgun). Epics cannot be made into Legendaries. Raise Attributes: Allows you to improve an item’s attributes (such as weapon life leech and skill cooldown). Mod Gear: Allows you to add Mods to various pieces of gear (such as adding bleeding bullets to a weapon or rejuvenation to a piece of armor). Swap Variant: Allows you to change an item’s variant (such as changing from a tactical weapon type with a larger magazine size to a sharpshooter weapon type with a higher crit multiplier). Level Up: Allows you to increase an item’s level (such as taking a weapon or piece of armor from Level 20 to Level 21, increasing its base stats but rerolling its attribute values; has max wearable level).
If you want to switch to a new piece of gear, simply choose it from the list on the left side of the screen, and it will automatically replace the equipment in the middle.
Crafting Materials
Outriders does a really good job of telling you exactly where and how to get various crafting resources — except for one: Anomaly Shards. Either way, we’ll cover them all below so you have them in one place.
Leather
Leather can be found in loot chests, as drops from animals and beasts, and from dismantling armor. It can also be purchased from Noah Dembele in Trench Town. It is used to improve armor rarity.
Iron
Iron comes from mining nodes and breaking down weapons. It can also be purchased from Noah Dembele in Trench Town. It is used to improve weapon rarity and swap weapon variants.
Titanium
Titanium comes from killing high-level enemies, such as mini-bosses and bosses, as well as from dismantling epic and legendary weapons. You can also eventually purchase it from Bailey for scrap. It is used to increase weapon and armor level.
Anomaly Shards
Anomaly Shards are a bit more “complicated,” so to speak. Shards tie directly into weapon and armor attributes under the “Raise Attributes” section of the crafting menu.
When you dismantle a weapon with a specific attribute, you get a certain number of Shards toward that attribute. Each weapon and armor piece will have a list of two to three attributes, and any with an Anomaly Shard symbol next to them will grant Shards for the attribute when broken down.
For example, if you break down an assault rifle with Weapon Life Leech, you’ll get a certain number of Shards towards upgrading the Weapon Life Leech attribute on another weapon.
You can see how much of each crafting material you have by looking under the resources section in the bottom right portion of the crafting menu. All of the materials except Shards will have a number next to them. Hover over Shards to see how many of each you have for all of the weapon attributes.
Dismantling Weapons and Armor vs. Selling Them
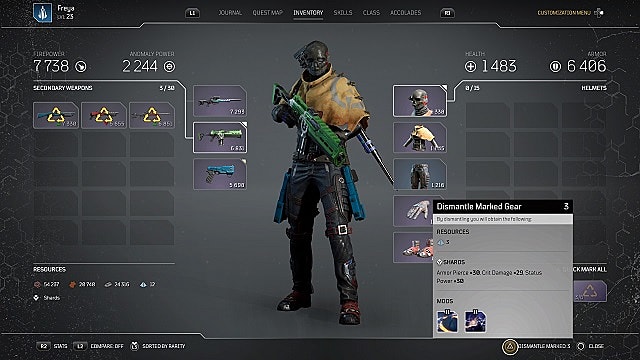
There are two ways to get rid of unwanted weapons and armor in Outriders: selling them to a vendor or dismantling them in the crafting menu or your inventory.
You can sell excess weapons to Gregor Ram, the weapons vendor, and excess armor to Eva Lopez, the armor merchant in Rift Town. You can also sell weapons to Eryk Rib and Noah Dembele and armor to Rough Pavlo in Trench Town. Each will give you a certain amount of Scrap based on the item’s rarity and level.
However, dismantling weapons and armor is much better than selling them, at least for a while. For one, you get plenty of Scrap from killing enemies and looting crates in your early expeditions and hunts. Second, dismantling gives you materials for crafting, turning all of those green drops into more than just trash.
Perhaps most importantly, though, dismantling weapons and armor lets you add mods to your mod catalog. If you see a square with four circles inside of it to the right of the mod icon on a certain weapon or armor piece, you already have that mod in your catalog and can put it on any other similar item.
Understanding Mods
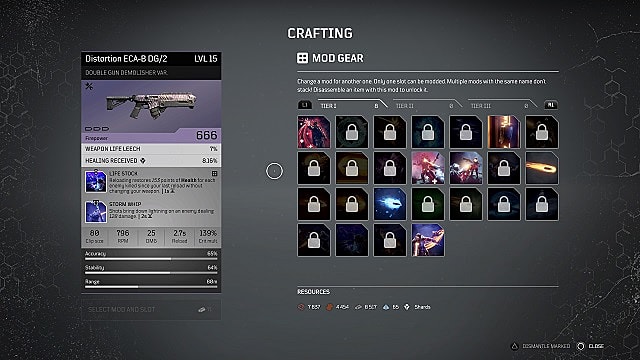
Common (white) and Uncommon (green) items do not have mods, nor can they have mods attached to them. Rare (blue) equipment comes with one mod and one slot. Epic (purple) and Legendary (gold) equipment come with two mods and two slots.
There are dozens of Outriders mods. Some are general enhancements that can be found on any weapon or armor piece. These include mods such as Toxic Bullets, Storm Whip, Hidden and Dangerous, Savor the Feeble, and more. We break down the best for general, cross-class use in this mods guide. Others are tied directly to specific classes, such as Weakening Zone for the Trickster or Fortify for the Technomancer.
Mod Tiers
Further, there are Tier I, Tier II, and Tier III mods. Some tiers decrease cooldown times; Ashen Bullets I has a cooldown of 8 seconds, while Ashen Bullets II has a cooldown time of 4 seconds. Others provide damage increases, health buffs, or anomaly power boosts, with Tier III mods having some incredible effects and worthy of end-game content.
Changing Mods
You can switch out mods whenever you want by going to the Mod Gear option in the crafting menu. Here, you can choose from all of the mods you’ve received by breaking items down. They are both general and class-specific, and you can attach them to the weapon, headgear, upper armor, etc., that you want.
When you’re ready to switch out mods, you can choose which slot a new one goes into the first time around. This overwrites the mod currently attached to that slot. Note, however, whenever you attach a new mod to a piece of gear for the first time, it locks whichever slot you didn’t choose.
So, for example, if you have Vampire and Resistance Breaker on a bolt action rifle, and you want to add Ruler of Leeches to the gun, you can attach Ruler of Leeches to either mod slot one or mod slot two. If you choose to override Resistance Breaker with it, Vampire is locked to the rifle forever.
You can still swap mods over Ruler of Leeches in slot two.
What do Red Backgrounds and Red Boxes Mean for Mods?
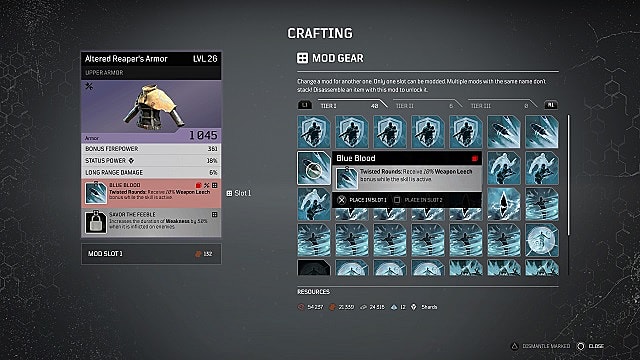
Mods cannot be stacked, and applying more than one of the same mod to an item does not increase a mod’s effect. For example, you can only gain the effects of one Additional Mag Twisted Rounds mod equipped to any piece of your Trickster’s armor at a time.
If you already have a mod applied, a small, bright red box will appear in the top right-hand corner of the mod description inside the Mod Gear menu. If you still try to equip that mod, the background of the mod description will turn red on items you’ve applied it to.
That’s basically everything you need to know about the Outriders crafting system. Its unique nature allows players to improve their favorite weapons and armor for often much longer than some other systems, and it keeps them from being forced into a build just because of an awesome mod. For more on Outriders, which is out now for PC, PS4, PS5, Xbox One, Xbox Series X|S, and Stadia, consider heading over to our growing guides hub.


